上一篇PART1文章中有提供了1602A的接腳圖,
1602A使用一個8位元(D0-D7)及其他控制腳位作為匯流排(bus),如下圖:

實際上使用時通常是使用4位元模式以節省I/O腳位。
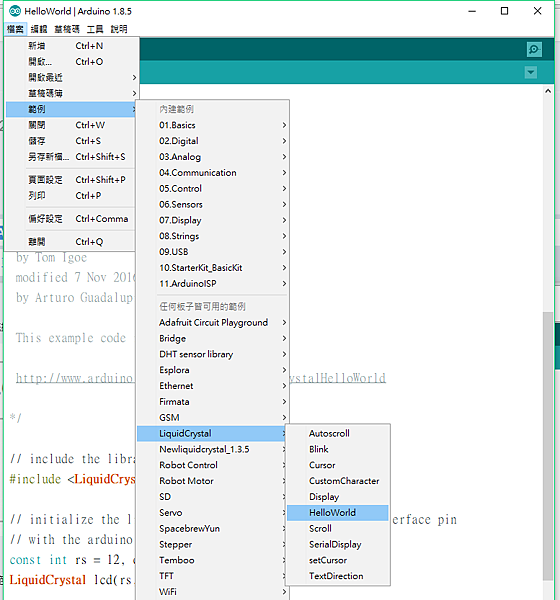
底下以arduino內建的函式庫與範例作為說明,先打開範例程式hello word
這個範例程式幾乎成為LCD入門的經典程式,網路上很多變形,這裡只使用
最原始的設定,開啟檔案如下圖:
完整程式:
/*
LiquidCrystal Library - Hello World
Demonstrates the use a 16x2 LCD display. The LiquidCrystal
library works with all LCD displays that are compatible with the
Hitachi HD44780 driver. There are many of them out there, and you
can usually tell them by the 16-pin interface.
This sketch prints "Hello World!" to the LCD
and shows the time.
The circuit:
* LCD RS pin to digital pin 12
* LCD Enable pin to digital pin 11
* LCD D4 pin to digital pin 5
* LCD D5 pin to digital pin 4
* LCD D6 pin to digital pin 3
* LCD D7 pin to digital pin 2
* LCD R/W pin to ground
* LCD VSS pin to ground
* LCD VCC pin to 5V
* 10K resistor:
* ends to +5V and ground
* wiper to LCD VO pin (pin 3)
Library originally added 18 Apr 2008
by David A. Mellis
library modified 5 Jul 2009
by Limor Fried (http://www.ladyada.net)
example added 9 Jul 2009
by Tom Igoe
modified 22 Nov 2010
by Tom Igoe
modified 7 Nov 2016
by Arturo Guadalupi
This example code is in the public domain.
http://www.arduino.cc/en/Tutorial/LiquidCrystalHelloWorld
*/
// include the library code:
#include <LiquidCrystal.h>
// initialize the library by associating any needed LCD interface pin
// with the arduino pin number it is connected to
const int rs = 12, en = 11, d4 = 5, d5 = 4, d6 = 3, d7 = 2;
LiquidCrystal lcd(rs, en, d4, d5, d6, d7);
void setup() {
// set up the LCD's number of columns and rows:
lcd.begin(16, 2);
// Print a message to the LCD.
lcd.print("hello, world!");
}
void loop() {
// set the cursor to column 0, line 1
// (note: line 1 is the second row, since counting begins with 0):
lcd.setCursor(0, 1);
// print the number of seconds since reset:
lcd.print(millis() / 1000);
}
範例程式預設腳位與接線:

實際接線可參考下圖:

範例程式經過編譯與上傳之後就會如上圖般顯示,
第一列顯示hello, world!
第二列則顯示程式開始執行後的秒數。
作為新手的程式練習與除錯(debug)來說是相當好上手的一個範例程式。
照做如果有問題就回頭檢查接線是否正確,最終必然能夠成功。
注意:
以上使用的接腳都是配合範例程式的預設,實際上使用時往往會配合其他sensor或是裝置而對
接腳有所更動,只要指定接腳與實際接腳相符,則LCD即可正常使用,如有不工作的情況,
請檢查程式中的設定與實際接腳是否相符即可。


 留言列表
留言列表