在前一個章節中我們已經可以利用MOSFET來控制電壓控制風扇轉速,
現在我們要結合前面章節中的轉速偵測,讓arduino可以控制電壓
呂阿谷 發表在 痞客邦 留言(0) 人氣(1,140)

前文中已經可以使用Arduino的PWM 接腳來控制4pin PC風扇,
但實務上使用會遇到一些困難,首先就如同之前討論PC風扇的文章中所說,
呂阿谷 發表在 痞客邦 留言(2) 人氣(4,849)
在PC散熱風扇之研究三:PWM風扇進階研究一文中介紹過用PWM控制
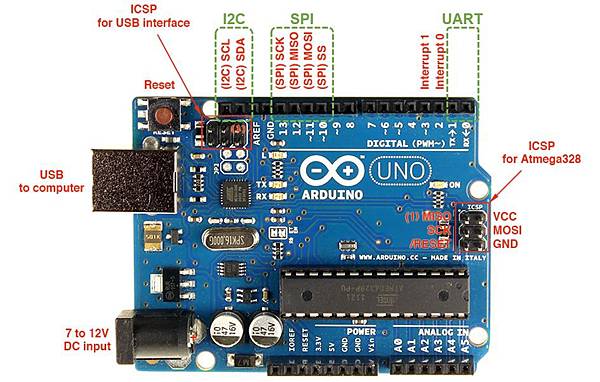
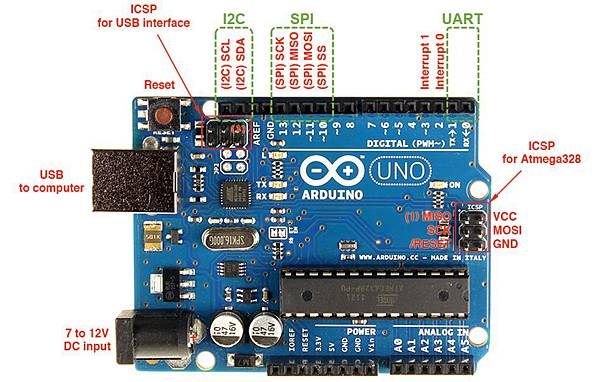
PC風扇轉速,而Arduino本身就提供好幾個PWM輸出腳位,可以直接
呂阿谷 發表在 痞客邦 留言(0) 人氣(18,590)
前面兩文介紹了兩種量轉速的方法,本文介紹另一種。
用中斷(interrupt)來進行風扇轉速量測很方便,
呂阿谷 發表在 痞客邦 留言(2) 人氣(2,290)

官網後段也有改進之後的程式:
// read RPM
int half_revolutions = 0;
int rpm = 0;
unsigned long lastmillis = 0;
void setup(){
Serial.begin(9600);
attachInterrupt(0, rpm_fan, FALLING); }
void loop(){
if (millis() - lastmillis == 1000){ //Uptade every one second, this will be equal to reading frecuency (Hz).
detachInterrupt(0);//Disable interrupt when calculating
rpm = half_revolutions * 60; // Convert frecuency to RPM, note: this works for one interruption per full rotation. For two interrups per full rotation use half_revolutions * 30.
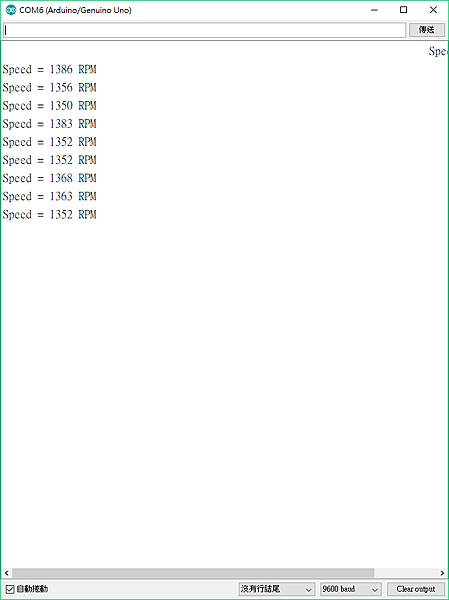
Serial.print("RPM =\t"); //print the word "RPM" and tab.
Serial.print(rpm); // print the rpm value.
Serial.print("\t Hz=\t"); //print the word "Hz".
Serial.println(half_revolutions); //print revolutions per second or Hz. And print new line or enter.
half_revolutions = 0; // Restart the RPM counter
lastmillis = millis(); // Uptade lasmillis
attachInterrupt(0, rpm_fan, FALLING); //enable interrupt
}
}
// this code will be executed every time the interrupt 0 (pin2) gets low.
void rpm_fan(){
half_revolutions++;
}
呂阿谷 發表在 痞客邦 留言(0) 人氣(1,801)
利用Arduino可以偵測與控制PC風扇,
本文介紹如何讀取風扇轉速的第一種方式。
呂阿谷 發表在 痞客邦 留言(4) 人氣(7,734)